✓ Sourdough relies on a 'starter' – a fermented mixture of flour and water.
✓ The process involves feeding your starter, mixing dough, bulk fermentation, shaping, proofing, and baking.
✓ Patience is key; sourdough baking is a multi-day process but largely hands-off.
✓ High-quality flour and proper hydration are crucial for a good crumb and crust.
How It Works
1
Activate Your Sourdough Starter
Before baking, ensure your starter is active and bubbly. This usually involves a 'feeding' with fresh flour and water, allowing it to double in size.
2
Mix & Bulk Ferment Your Dough
Combine active starter, flour, water, and salt. Allow the dough to ferment at room temperature for several hours, performing 'stretch and folds' to build strength.
3
Shape & Cold Proof
Gently shape your fermented dough into a round or oval, then place it in a floured banneton or bowl. Refrigerate overnight for a slow, flavorful proof.
4
Bake to Perfection
Preheat a Dutch oven until scorching hot. Score your cold dough, bake covered for initial steam, then uncovered for a crispy, golden crust.
Understanding Your Sourdough Starter: The Heart of Your Loaf
Photo: Anh Nguyen / Pexels
Embarking on the journey of how to make sourdough bread at home begins with understanding its living, breathing heart: the sourdough starter. This isn't just an ingredient; it's a symbiotic culture of wild yeasts and lactobacilli, captured from the air and flour, that gives sourdough its distinctive tangy flavor, incredible texture, and natural leavening power. Think of it as a pet that needs regular feeding and care, and in return, it will produce magnificent bread for years to come. A healthy, active starter is paramount to successful sourdough baking. It should be bubbly, smell pleasantly yeasty and slightly sour, and reliably double in size within 4-8 hours after feeding. If your starter is sluggish, your bread will be dense and flat. Many aspiring bakers rush this crucial first step, only to be disappointed. Patience and observation are your best tools here. You can either cultivate your own starter from scratch, a process that takes about 7-10 days, or obtain one from a friend or a reputable online source. Creating your own involves simply mixing equal parts flour and water and letting nature do its work, feeding it daily. For those who choose to make their own, remember that the type of flour you use for feeding can influence its activity and flavor profile. A mix of unbleached all-purpose and whole wheat flour often yields robust results. Once established, maintaining your starter is relatively simple. Store it in the refrigerator if you don't bake frequently, and feed it at least once a week. When you're ready to bake, take it out, feed it, and let it come to room temperature and become active. This active, 'ripe' starter is what you'll use in your dough. Without a vibrant starter, the rest of your efforts will fall short. Nurturing this living culture is not just a chore; it's part of the magic of sourdough, connecting you to generations of bakers who have harnessed these natural forces. Understanding its behavior – how it reacts to temperature, hydration, and different flours – will deepen your appreciation for the bread you create. Remember, practice makes perfect, and even experienced bakers have off days with their starters. Don't be discouraged if your first few attempts aren't perfect. It's a learning process, and every interaction with your starter will teach you more about its unique personality. For more tips on maintaining your starter, check out our guide to sourdough starter care.
The Art of Mixing and Bulk Fermentation for Perfect Sourdough
Photo: Patricio Nahuelhual / Pexels
Once your sourdough starter is robustly active, the next exciting phase in how to make sourdough bread at home is mixing the dough and initiating bulk fermentation. This stage is where the magic truly begins to coalesce, transforming simple ingredients into a living, elastic mass. The core components of sourdough dough are surprisingly few: active sourdough starter, flour, water, and salt. The type of flour plays a significant role; a high-protein bread flour provides the gluten structure necessary for a good rise and open crumb, while a small percentage of whole wheat or rye flour can add depth of flavor and nutrition. Hydration, or the ratio of water to flour, is another critical factor. Higher hydration doughs often yield a more open, airy crumb, but they can be trickier to handle. Beginners might start with a slightly lower hydration (around 70%) and gradually increase it as they gain confidence. The mixing process itself can vary. Some bakers prefer a 'no-knead' approach, relying entirely on gentle folds, while others might perform a brief period of traditional kneading. The goal is to fully incorporate the ingredients and begin developing the gluten. This is often followed by an 'autolyse' period, where flour and water are mixed and allowed to rest for 30-60 minutes before adding the starter and salt. This rest helps the flour fully hydrate and gluten development to begin naturally, making the final mixing easier. After the initial mix, the dough enters bulk fermentation, also known as the first rise. This is arguably the most crucial stage for flavor and structure development. During bulk fermentation, the wild yeasts in your starter consume sugars in the flour, producing carbon dioxide gas that inflates the dough, and the lactobacilli produce lactic and acetic acids, which contribute to the characteristic sour flavor. The duration of bulk fermentation is highly dependent on ambient temperature, the activity of your starter, and the hydration of your dough. It can range from 3 to 8 hours or even longer. Throughout this period, you’ll perform a series of 'stretch and folds' every 30-60 minutes for the first few hours. This technique gently strengthens the gluten network without aggressively kneading, redistributes the yeast and bacteria, and helps to equalize the dough's temperature. You'll notice the dough becoming smoother, more elastic, and gaining volume. The dough should feel airy and show signs of significant bubbling. Knowing when bulk fermentation is complete is more an art than a science, often determined by visual cues (the dough should have increased in volume by 30-50% and look visibly bubbly) and how it feels to the touch (puffy and jiggly). Over-fermentation can lead to a sticky, unmanageable dough and a dense crumb, while under-fermentation results in a tight crumb and less flavor. Pay attention to your dough – it will tell you what it needs. Mastering bulk fermentation sets the foundation for a truly exceptional sourdough loaf.
Shaping, Proofing, and Baking Your Artisan Sourdough Loaf
Photo: Natalia Olivera / Pexels
The final stages of how to make sourdough bread at home – shaping, proofing, and baking – are where all your patience and hard work culminate in a beautiful, delicious loaf. After a successful bulk fermentation, your dough will be bubbly and alive. The first step is to gently 'preshape' the dough. Turn it out onto a lightly floured surface, and without deflating it too much, gently form it into a loose round or rectangle. Allow it to rest for 20-30 minutes, uncovered, to relax the gluten. This 'bench rest' makes the final shaping much easier. Final shaping is critical for developing tension on the dough's surface, which helps the loaf hold its structure during baking and creates that desirable 'oven spring.' There are various shaping techniques, but the goal is always to create a taut skin on the outside while trapping air within. For a round loaf (boule), you might fold the edges into the center, then flip it over and use the friction of the counter to create surface tension as you cup and pull the dough towards you. Once shaped, the dough needs its final proof, often called 'cold proofing' or 'retarding.' Transfer the shaped dough, seam-side up, into a floured banneton (a proofing basket) or a bowl lined with a floured towel. Cover it tightly and refrigerate for 8-16 hours, or even up to 24 hours. Cold proofing slows down fermentation, allowing the flavors to deepen and making the dough much easier to handle and score when cold. It also buys you flexibility in your baking schedule. When you're ready to bake, preheat your oven to a very high temperature (usually 450-500°F / 230-260°C) with a Dutch oven inside for at least 30-60 minutes. A scorching hot Dutch oven mimics a professional bread oven, providing intense initial heat and trapping steam, which is essential for a good crust and oven spring. Carefully remove the hot Dutch oven, invert your cold dough into it, and quickly score the top of the loaf with a sharp razor blade or lame. Scoring allows the dough to expand predictably and prevents uncontrolled bursting. Bake covered for the first 20-25 minutes to create steam, which keeps the crust soft and pliable, allowing the loaf to expand fully. Then, remove the lid and continue baking for another 20-30 minutes, or until the crust is deeply golden brown and the internal temperature reaches 200-210°F (93-99°C). The sound of a hollow thump when tapped on the bottom also indicates doneness. Finally, resist the urge to slice into your beautiful loaf immediately! Transfer it to a wire rack and let it cool completely for at least 1-2 hours. Slicing too early can result in a gummy crumb, as the internal structure is still setting. This cooling period is just as important as any other step in developing the perfect texture and flavor. For more detailed instructions on shaping, explore our sourdough shaping techniques guide.
Troubleshooting Common Sourdough Problems & Essential Tips
Photo: cottonbro studio / Pexels
Even with the best intentions, learning how to make sourdough bread at home can present its challenges. Don't be discouraged by initial setbacks; every 'failed' loaf is a learning opportunity. Here are some common problems and essential tips to help you navigate your sourdough journey:
**Common Sourdough Problems & Solutions:**
* **Flat, Dense Loaf:** This is often due to an inactive starter, under-proofed dough, or insufficient gluten development during bulk fermentation. Ensure your starter is consistently doubling, extend bulk fermentation, and perform enough stretch and folds.
* **Gummy Crumb:** Usually a result of slicing the bread before it has fully cooled. The starches are still gelatinizing, and the internal structure needs time to set. Always let your loaf cool completely.
* **No Oven Spring:** Can be caused by an over-proofed dough (where the yeast has exhausted its food supply), insufficient surface tension from shaping, or not enough heat/steam in the oven. Ensure you're not proofing too long and your Dutch oven is adequately preheated.
* **Crust is Too Pale or Too Dark:** Adjust baking time and temperature. If too pale, bake longer uncovered. If too dark, consider lowering the oven temperature slightly for the uncovered bake, or covering it earlier if it browns too quickly.
* **Sourness Level:** For a milder flavor, use your starter when it's just peaked, and cold proof for a shorter duration. For a more pronounced tang, use an older starter (fed less recently) and extend cold proofing.
**Essential Sourdough Baking Tips:**
* **Weigh Your Ingredients:** Accuracy is paramount in baking, especially with sourdough. Use a digital kitchen scale for all ingredients, particularly flour and water.
* **Understand Your Starter's Rhythm:** Get to know how your specific starter behaves at different temperatures. This will help you time your feeds and baking schedule.
* **Room Temperature Matters:** Ambient temperature significantly impacts fermentation times. In warmer kitchens, dough will ferment faster; in colder ones, slower. Adjust accordingly.
* **Don't Over-Flour:** When shaping, use minimal flour on your work surface to avoid incorporating too much into the dough, which can affect hydration and texture.
* **Embrace the Dutch Oven:** It's a game-changer for home bakers, providing the enclosed steam environment needed for a beautiful crust and maximum oven spring. If you don't have one, you can simulate steam with a tray of hot water in the bottom of your oven.
* **Keep a Baking Journal:** Note down details like room temperature, starter activity, fermentation times, and results. This will help you identify patterns and refine your technique over time.
* **Practice, Practice, Practice:** Sourdough baking is a skill that improves with repetition. Don't aim for perfection on your first try; enjoy the process and learn from each loaf.
By understanding these common pitfalls and implementing these tips, you'll be well on your way to consistently baking delicious, artisanal sourdough bread at home. Remember, every baker's journey is unique, and finding what works best for you and your kitchen is part of the rewarding experience.
Comparison
Feature
Sourdough Bread
Commercial Yeast Bread
No-Knead Artisan Bread
Leavening Agent
Wild Yeast & Bacteria (Starter)
Commercial Baker's Yeast
Commercial Baker's Yeast
Flavor Profile
Tangy, Complex, Rich
Mild, Yeasty
Mild, Rustic
Digestion
Easier (due to fermentation)
Standard
Standard
Time Commitment
Multi-day (hands-off)
Few hours
Overnight proofing
Crust & Crumb
Chewy, Open Crumb, Thick Crust
Soft Crumb, Softer Crust
Rustic, Open Crumb, Chewy Crust
Ingredients
Flour, Water, Salt, Starter
Flour, Water, Salt, Yeast, (Sugar/Fat)
Flour, Water, Salt, Yeast
What Readers Say
★★★★★
"This guide made learning how to make sourdough bread at home so much less intimidating. My first loaf had an amazing crust and open crumb, just like the pictures! I'm officially hooked on baking my own bread."
Sarah J. · Austin, TX
★★★★★
"I've tried other sourdough recipes, but this one's detailed explanations for bulk fermentation and shaping finally clicked for me. My starter is thriving, and I'm consistently getting beautiful, tangy loaves."
Mark D. · Seattle, WA
★★★★★
"Following these steps, I went from a novice to baking two perfect sourdough boules a week! The tips on troubleshooting really helped me understand what went wrong on my first attempt, leading to much better results."
Emily R. · Denver, CO
★★★★★
"The guide is incredibly thorough, though the initial investment in time for the starter is significant. Once that's established, the baking process is surprisingly meditative and rewarding. Definitely recommend for anyone serious about artisan bread."
David L. · Boston, MA
★★★★★
"As a busy parent, I appreciated the emphasis on cold proofing. It allows me to fit baking into my schedule without sacrificing quality. My family loves the homemade sourdough for sandwiches and toast."
Jessica M. · Portland, OR
Frequently Asked Questions
What is the most important factor in how to make sourdough bread at home?
The most important factor is a healthy, active sourdough starter. Without a vibrant starter, your bread won't rise properly, and it won't develop the characteristic tangy flavor. Nurturing your starter with regular feedings and observing its activity is crucial for consistent success.
Is sourdough bread making difficult for beginners?
While sourdough baking has a reputation for being challenging, it's very achievable for beginners with patience and a good guide. The process involves several distinct stages, but much of the time is hands-off fermentation. The key is to understand each step and not rush the process.
How do I store my sourdough bread to keep it fresh?
To keep your sourdough fresh, store it at room temperature, cut-side down, on a cutting board, or in a bread box for 2-3 days. For longer storage, wrap it tightly in plastic wrap or foil and freeze for up to a month. Avoid refrigerating whole loaves, as it can dry them out.
What equipment do I need to start making sourdough at home?
Essential equipment includes a digital kitchen scale, a large mixing bowl, a dough scraper, a banneton (proofing basket) or a bowl lined with a floured towel, and a Dutch oven. A lame (razor blade) for scoring is also highly recommended for best results.
How does sourdough compare to regular yeast bread in terms of health benefits?
Sourdough bread is often considered more digestible than regular yeast bread due to the long fermentation process. This process breaks down some of the gluten and phytic acid, making nutrients more bioavailable and potentially reducing digestive discomfort for some individuals.
Who should attempt to make sourdough bread at home?
Anyone with a love for real bread, a bit of patience, and a desire to connect with the ancient art of baking should attempt to make sourdough bread at home. It's a rewarding hobby that yields incredibly delicious and healthy results, perfect for those who appreciate natural, slow-fermented foods.
What if my sourdough starter gets moldy?
If your sourdough starter develops mold, unfortunately, it's best to discard it and start fresh. Mold indicates contamination, and it's not safe to consume. To prevent mold, ensure your jars are clean, use fresh, unbleached flour, and maintain regular feeding schedules to keep the healthy microbes dominant.
What are the emerging trends in home sourdough baking?
Emerging trends include experimenting with different flour blends (e.g., ancient grains like Einkorn or Spelt), incorporating inclusions like seeds, herbs, or dried fruits, and exploring various shaping techniques for unique loaf presentations. There's also a growing interest in understanding the microbiology of starters and optimizing fermentation for specific flavor profiles.
Now that you have a comprehensive understanding of how to make sourdough bread at home, it's time to gather your ingredients and get baking! Embrace the journey, trust the process, and soon you'll be enjoying the incredible aroma and taste of your very own artisan sourdough loaves. Happy baking!
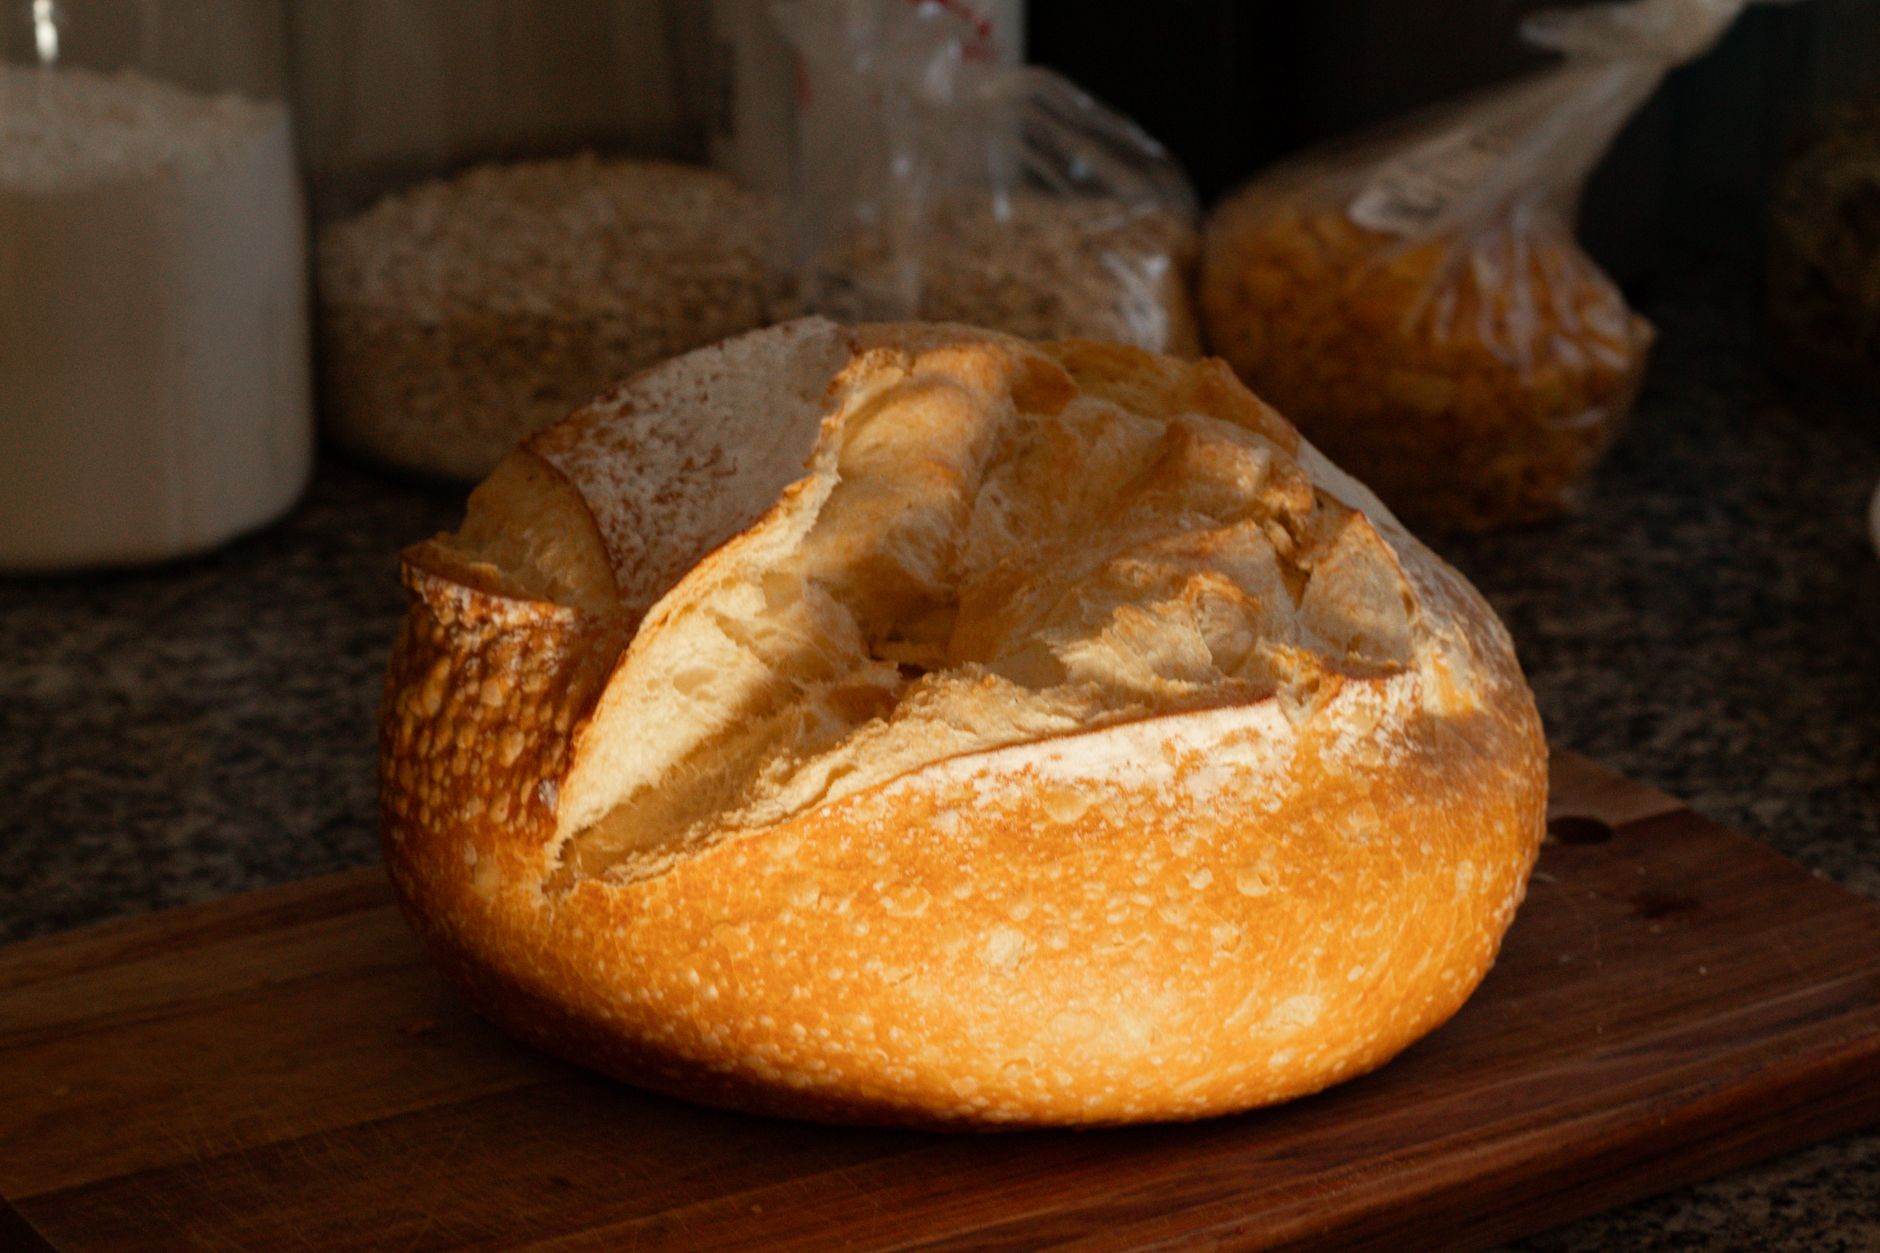
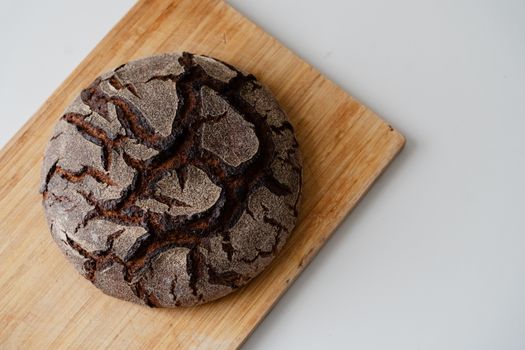 Photo: Anh Nguyen / Pexels
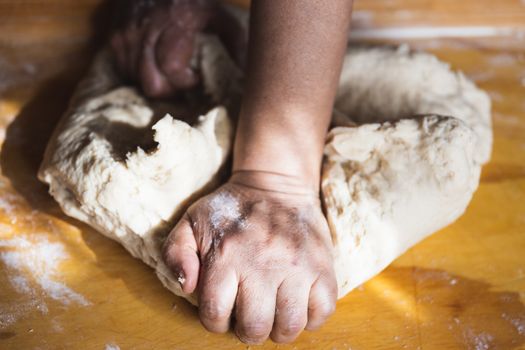 Photo: Patricio Nahuelhual / Pexels
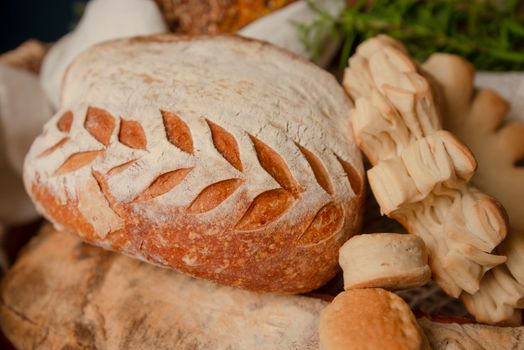 Photo: Natalia Olivera / Pexels
 Photo: cottonbro studio / Pexels